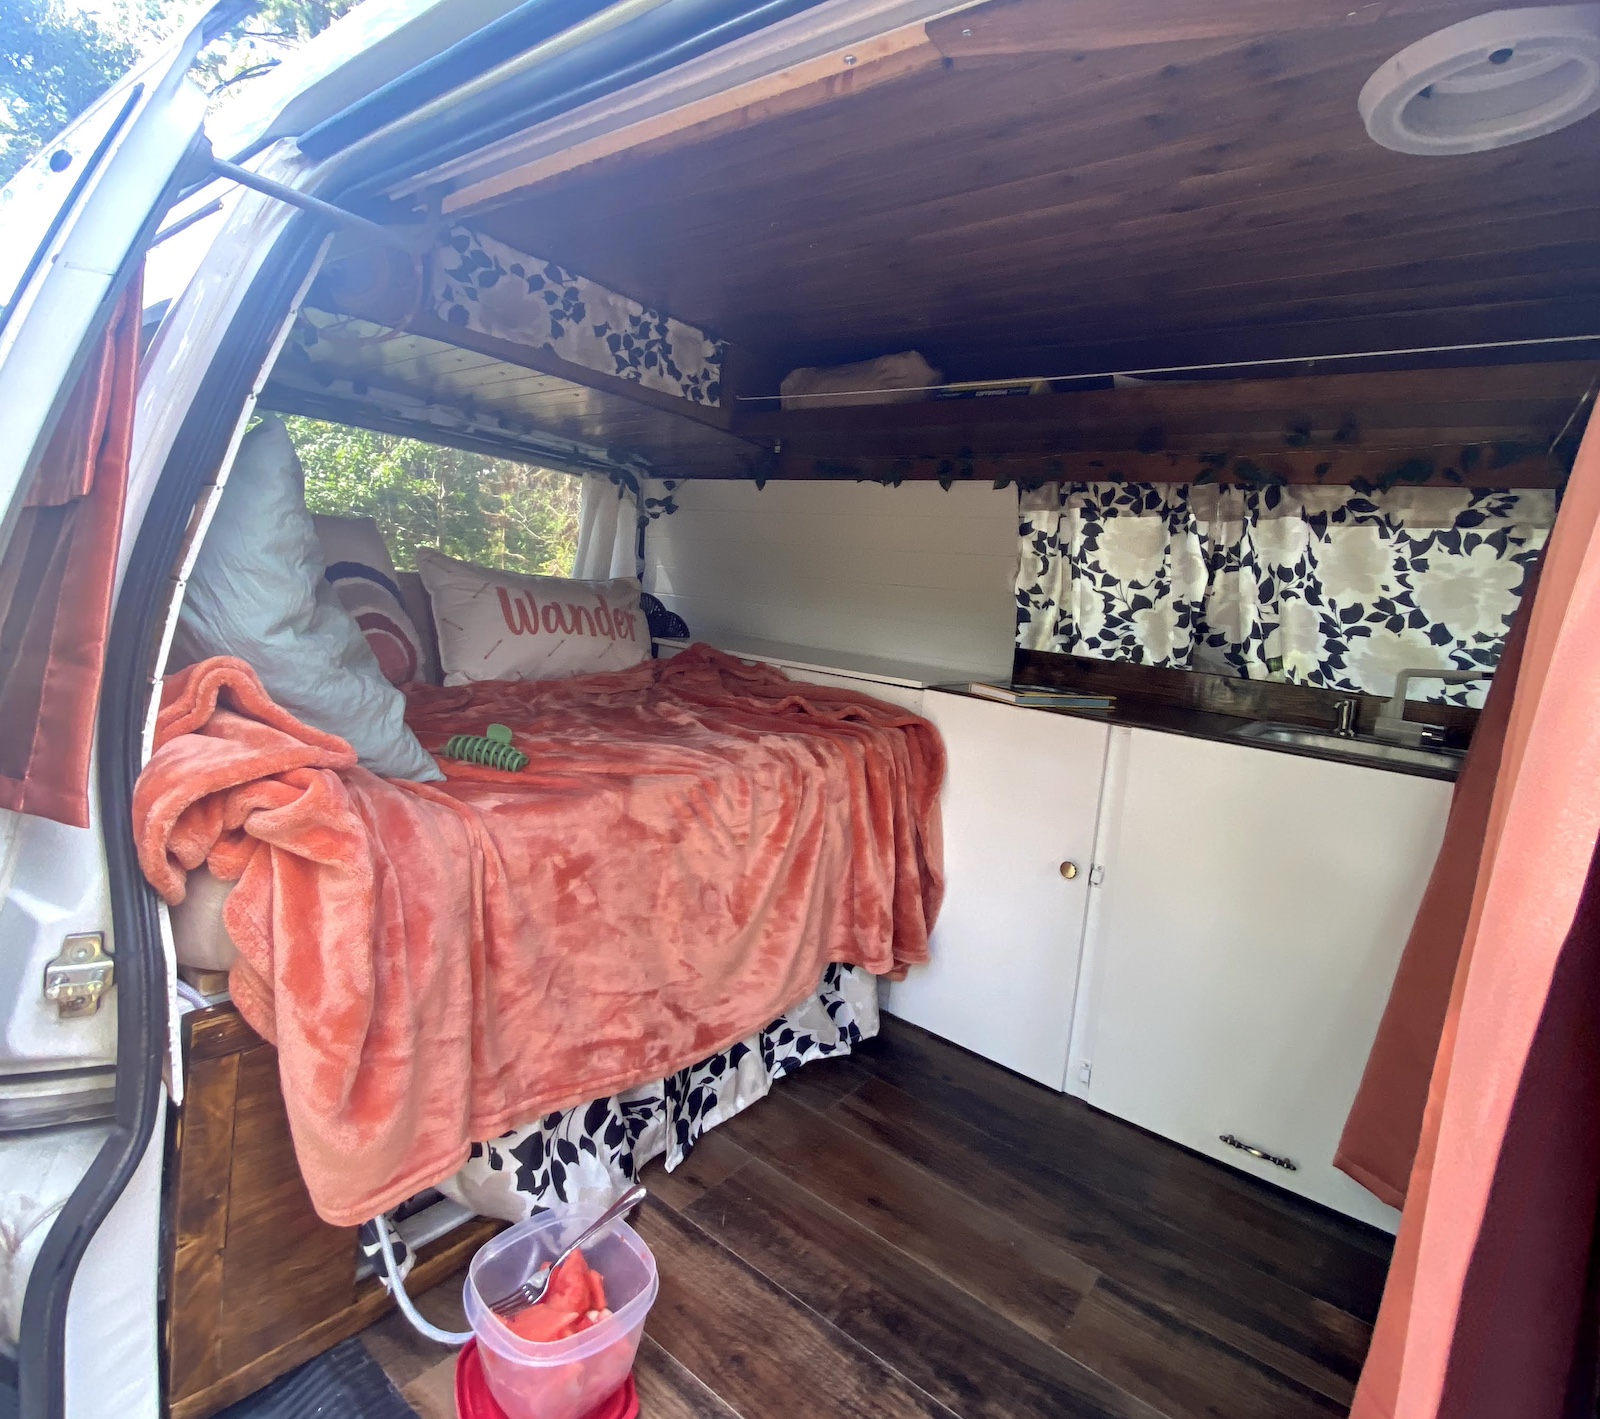
A few years ago, during the midst of the COVID-19 pandemic, I decided there would be no better time to start my van life journey.
Back in March 2020, I was at my in-office content manager job when news of the COVID-19 outbreak broke out. Shortly after, my in-office job became a temporarily remote job…and then a permanently remote job. I spent the following months working from home and quarantining at home. Most international travel was halted at that time as each country was trying to figure out how best to stop the spread of the COVID-19 virus. Some countries even completely closed their borders.
It was a grim time full of fear and uncertainty about the future. I had started to grow restless in Houston and began going on solo road trips around the state of Texas to escape into nature. As Texas is a huge state, there is no shortage of outdoor adventures.
While on one of my road trips in my little 2010 Nissan Cube, I thought, “Why not build a campervan? I could more comfortably explore Texas and maybe even set out west. I finally have a full-time remote job after all.”
With only a few thousand dollars to my name and a Pinterest board of boho vans, I spent a month or so researching van models.
I knew I couldn’t afford a Mercedes Sprinter, Ford Transit, Ram ProMaster, or any van that I could stand in as a tall 5’9 girlie. I also didn’t want to finance a vehicle for this as I already had student loans I needed to pay off.
What I realized I could afford though was an old Chevy Astro. It was the best-looking, affordable, mid-sized van model within my budget. My favorite feature of it that ultimately sold me on it was the Dutch back doors.
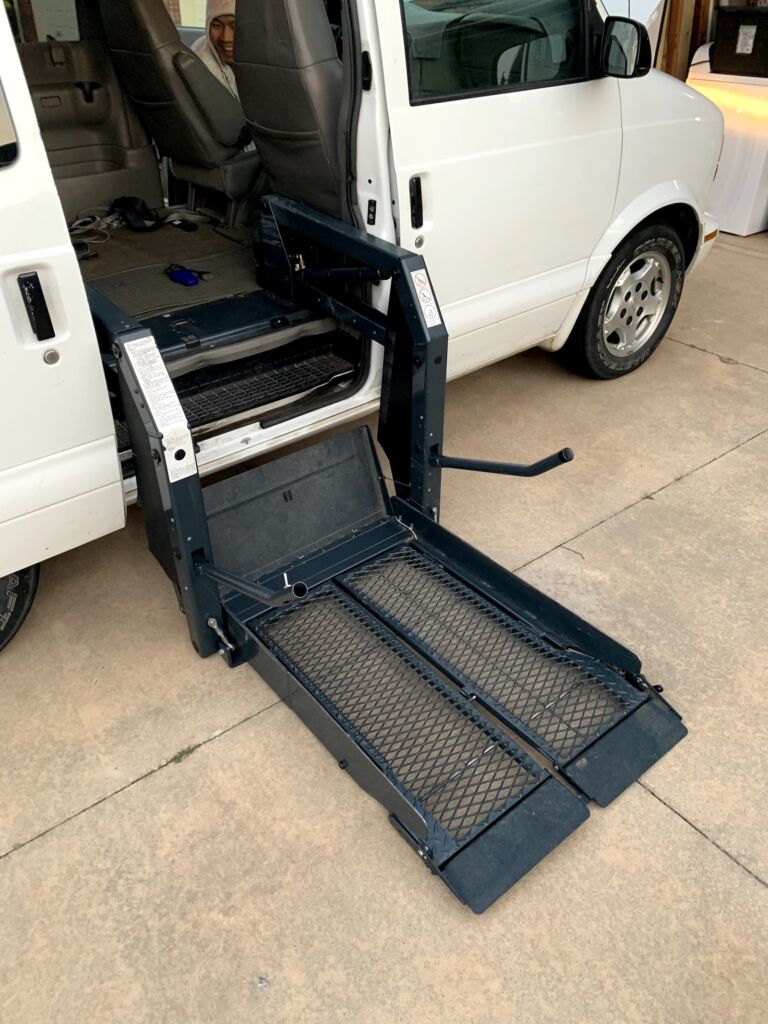
After weeks of scouring the Facebook marketplace for the best Chevy Astro deal, I found a 2005 model with 123,000 miles selling for $3,000. This Chevy Astro van was custom-fitted with a high-top roof and had a motorized wheelchair lift inside.
Once I received a solid-looking Carfax report, I decided to make the plunge to get the van. As the van was in Arkansas, and I was in Oklahoma at that time, I would have to rent a car to drive to Arkansas by myself to purchase the van and then drive the van 6 hours back home. Before I made the trip to Arkansas, I paid a local mechanic $120 to inspect the van. Once I heard back from the mechanic that the van was in decent shape (with a few minor issues) and worth $3,000, I set off to Arkansas.
Expenses of Buying a Van
After purchasing the car, I had to pay a lot of fees such as the tag fee, excise fee, sales tax, notary, etc. The total cost for the van, initial mechanical inspection, and registration fees totaled up to $3,351.44.
| Van | $3,000.00 |
| Mechanical Inspection | $120.00 |
| Auto Tag | $46.00 |
| Auto Penalty | $10.00 |
| Excise | $70.00 |
| Excise Penalty | $10.00 |
| Sales Tax | $37.50 |
| Sales Tax Penalty | $0.15 |
| Title | $11.00 |
| Notary | $10.00 |
| WST Tire Fee | $14.50 |
| Insurance | $1.50 |
| CC Transaction Fee | $6.79 |
| Inspection | $4.00 |
| Title Reprint (Lien Removal) | $10.00 |
Initial Expenses of Fixing the Van
The next part was doing some minor mechanical fixes to the van. When I purchased the van, it was leaking transmission oil and drove a bit rough. The 6-hour drive back was slightly anxiety-inducing and gave me a pang of buyer’s remorse to be completely honest. The mechanic who inspected the van advised me to replace the spark plugs, spark wires, and transmission oil pan gasket.
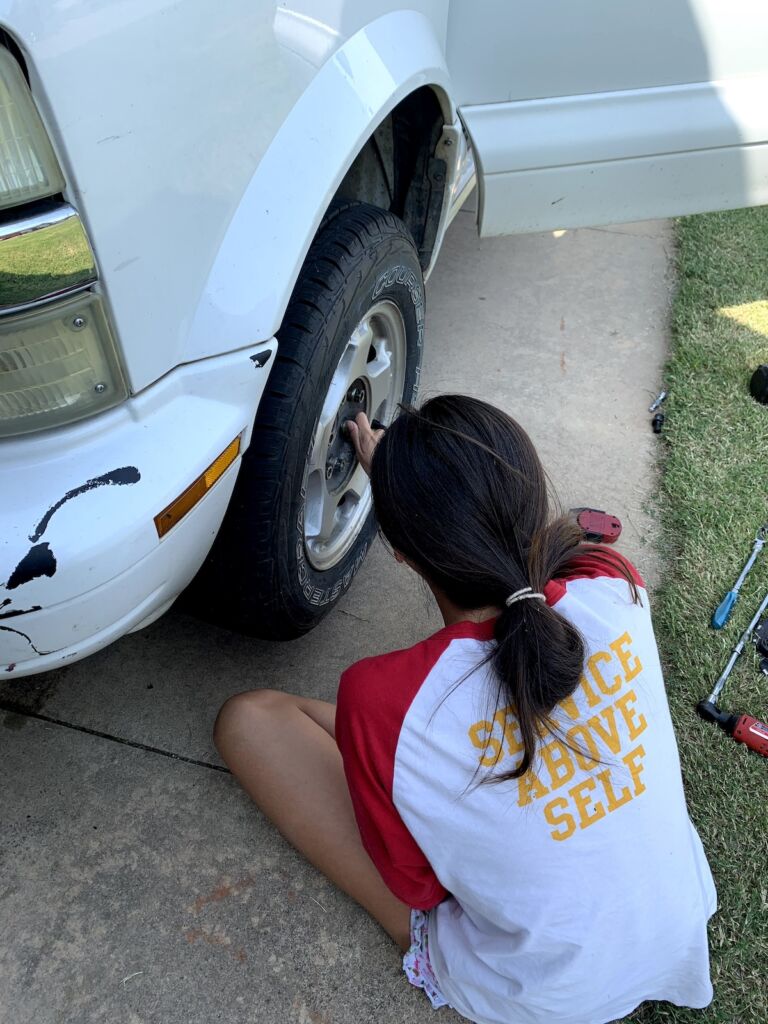
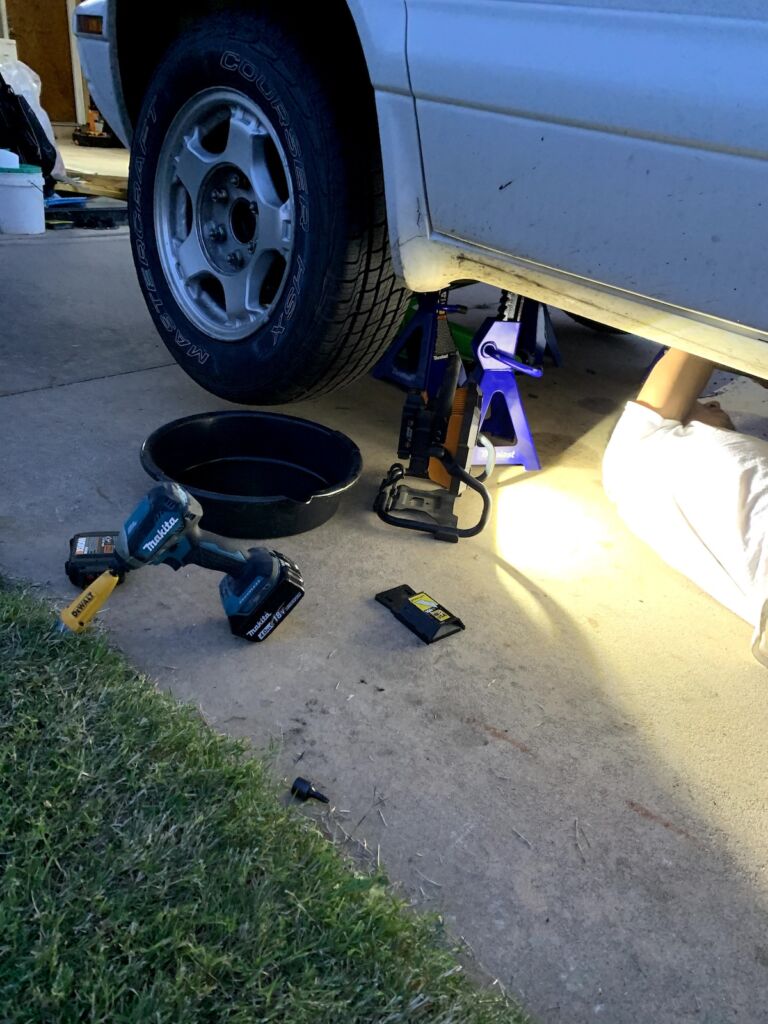
Thanks to having a super handy brother-in-law, I was able to save some money on mechanical labor. I spent $486.49 on supplies for the initial mechanical repairs to get the van functioning normally.
| Fixing the Van | Cost of Parts | # of Parts | Total Cost (including labor) |
| Automatic Transmission Oil Pan Gasket | $21.65 | 1 | $21.65 |
| Platinum Spark Plug | $20.31 | 6 | $121.86 |
| Spark Plug Wire Set | $47.98 | 1 | $47.98 |
| New Tires | $65.00 | 3 | $195.00 |
| Hood Latch + Flush Breaks + Replace AC Thing + Rear Main Seal Fluid | $0.00 | 0 | $100.00 |
Expenses of Building a Campervan
Once my van was finally in better mechanical shape and running smoothly, I started on the actual build.
Please note that the costs listed are the prices I paid from 2020-2021.
This post contains affiliate links, which means I may earn a commission if you make a purchase through these links. Please note that I only recommend products that I personally use. Your support helps keep this content free at no extra cost to you.
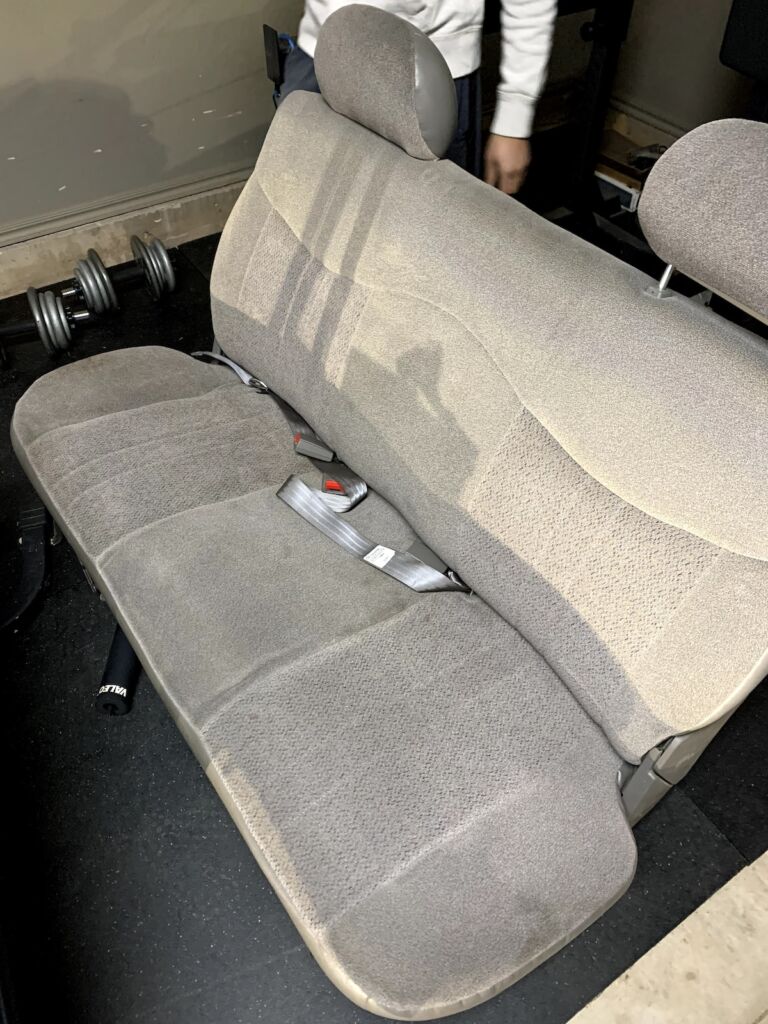
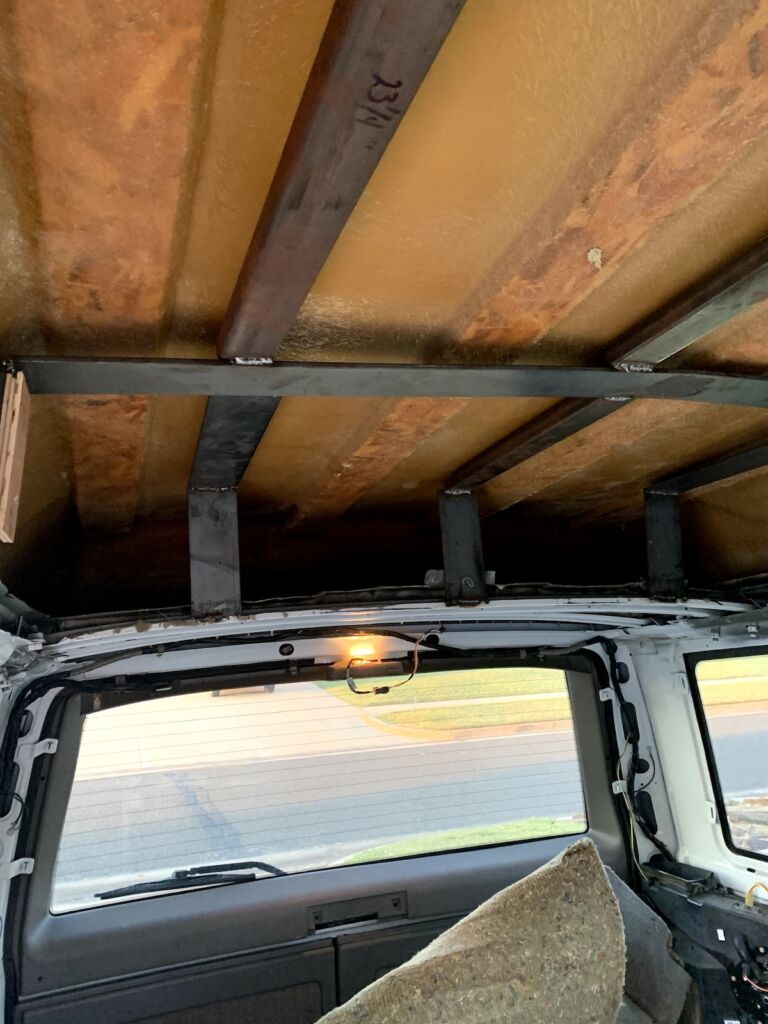
Well, actually first, I started ripping out everything inside my van so that I could have a blank canvas for the actual build. This required removing the back seats, the ceiling fabric, the plastic trims, the walls, and the flooring. Not to mention, there was also a 300+ pound wheelchair lift that required 3 grown men to remove. The whole process of removing everything inside of the van took blood, sweat, and tears. You can easily skip this step if you buy an empty cargo van, though you’ll need more than a $7k budget.
Now we’re ready to talk about the cost of the campervan build.
Patching Holes
The process of stripping everything from the inside of the van left some holes in the van from the bolts that had previously held stuff in place. To repair those, I patched the holes with some coins and sealant.


The sealant and other adhesives that I needed cost a total of $59.00.
| ADHESIVES | Cost of Parts | # of Parts | Total Cost |
| 3M Hi-Strength 90 Spray Adhesive | $12.98 | 1 | $12.98 |
| 3M Super 77 Multipurpose Permanent Spray Adhesive | $9.98 | 1 | $9.98 |
| AP Products 017-90891 White Sikaflex-221, 10.1 oz | $15.70 | 1 | $15.70 |
| Dicor 501LSW-1 Epdm Self-Leveling Lap Sealant-10.3 Oz. | $11.38 | 1 | $11.38 |
| Henkel Corporation 908570 2.7 oz Tub Clear Silicone Waterproof Sealant | $4.98 | 1 | $4.98 |
| Duct Tape | $1.00 | 1 | $1.00 |
| 3-1/2 in. x 3/4 in. Sticky Back Strips (4-Pack) | $2.98 | 1 | $2.98 |
Sound Deadening
After the holes were patched up, I applied pieces of sound-deadening mats to the bare metal. This is an optional step to reduce noise from inside the van. I spent $59.99 for the sound-deadening material.


| SOUND DEADENING | Cost of Parts | # of Parts | Total Cost |
| Kilmat 50 mil 50 sqft Car Sound Deadening Mat | $59.99 | 1 | $59.99 |
Subfloor
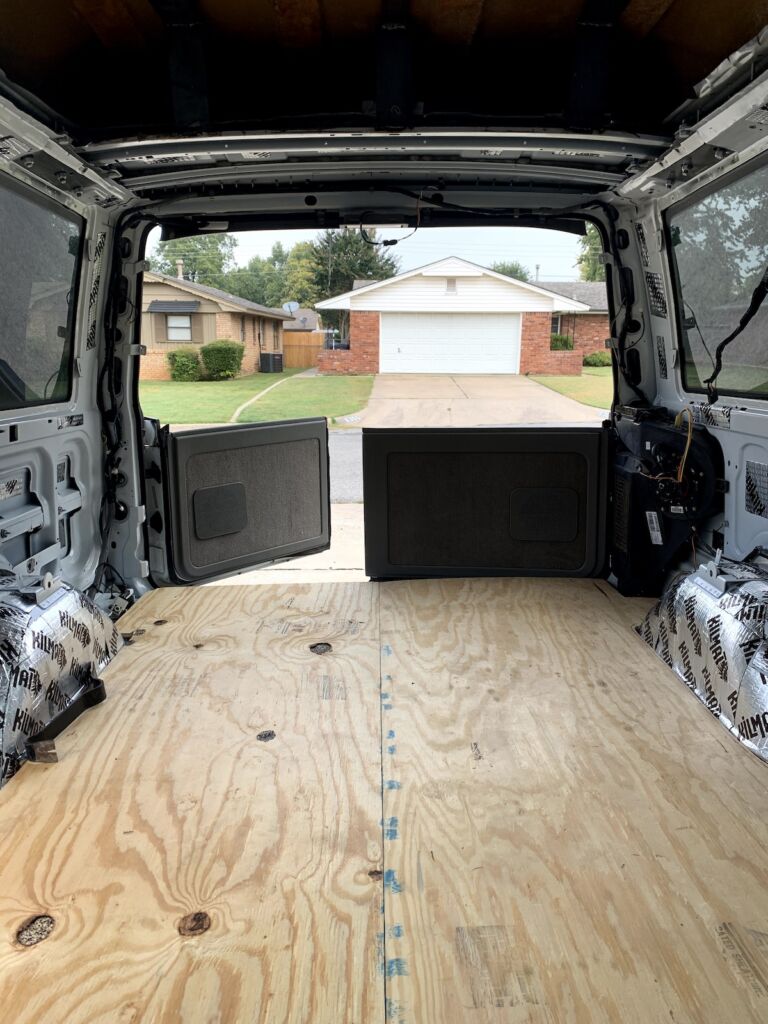
Once the sound-deadening material was applied, I decided to work on my subfloor. For my subfloor, I laid STYROFOAM sheathing on the bare metal flooring for insulation and then pine sheathing on top of that for structural support. The total cost for my subfloor was $47.95.

| SUBFLOOR | Cost of Parts | # of Parts | Total Cost |
| R-3 (Common: 0.5-in x 8-ft x 4-ft; Actual: 0.437-in x 7.937-ft x 3.875-ft) 1 Unfaced Polystyrene | $12.96 | 2 | $25.92 |
| Plytanium 3/8 Cat Ps1-09 Square Structural Pine Sheathing, Application as 4 x 8 (for subfloor) | $22.03 | 1 | $22.03 |
Wall and Ceiling Insulation
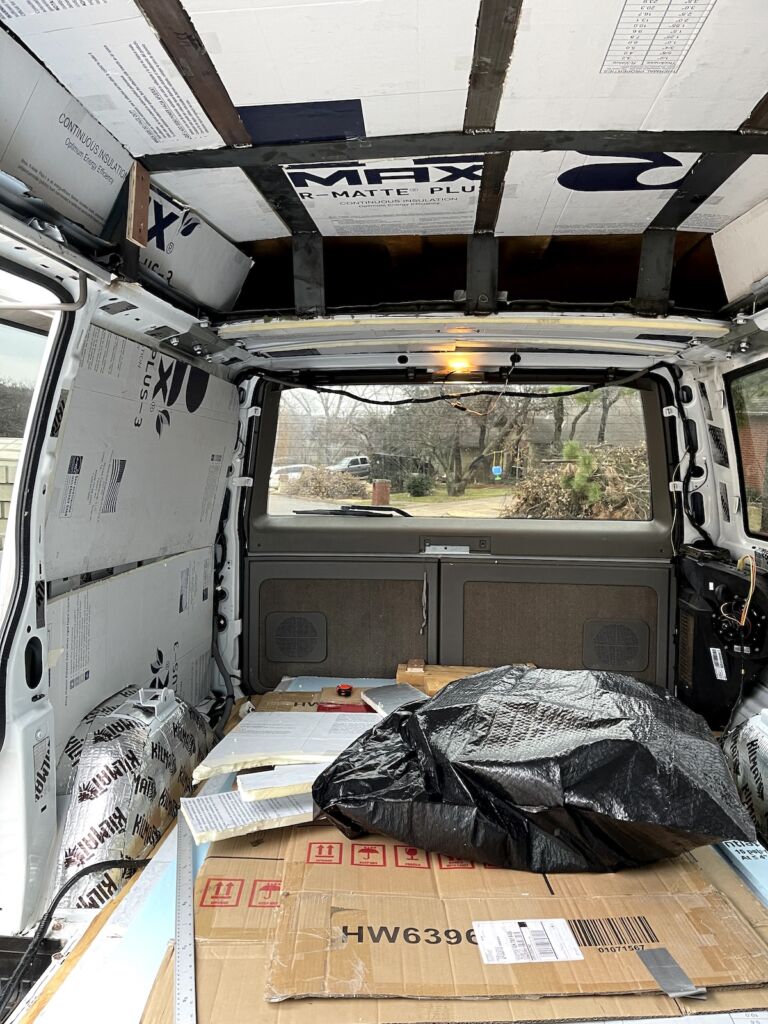
Next up was installing the wall and ceiling insulation. To be honest, I’m not sure if I did this step right since my van always felt either too hot or too cold. I used insulating foam sealant, polyiso foam boards, and aluminum tape. For insulation materials, I spent a total of $128.62.
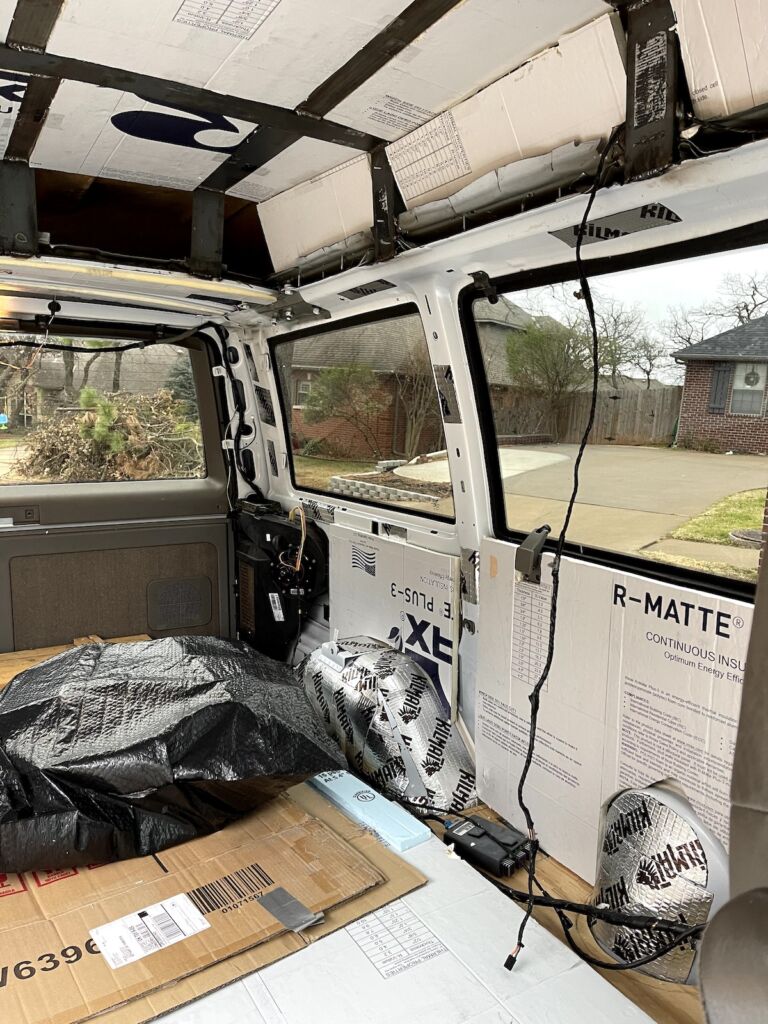
| WALL & FLOOR INSULATION | Cost of Parts | # of Parts | Total Cost |
| GREAT STUFF PRO Gaps & Cracks 24 oz Insulating Foam Sealant | $14.39 | 4 | $57.56 |
| R-5 (Common: 0.75-in x 4-ft x 8-ft; Actual: 0.75-in x 4-ft x 8-ft) R-Matte Plus-3 1 Faced Polyisocya | $15.77 | 4 | $63.08 |
| 3M Aluminum Foil Tape 3381, 1.88 in x 50 yd, 2.7 mil, Silver, HVAC, Sealing and Patching, Moisture Barrier, Cold Weather, Air Ducts, Foam Sheathing Boards, Insulation, Metal Repair | $7.98 | 1 | $7.98 |
Flooring
For flooring, I decided to go with vinyl plank floor for cost and ease of installation. The total cost for my flooring was $40.
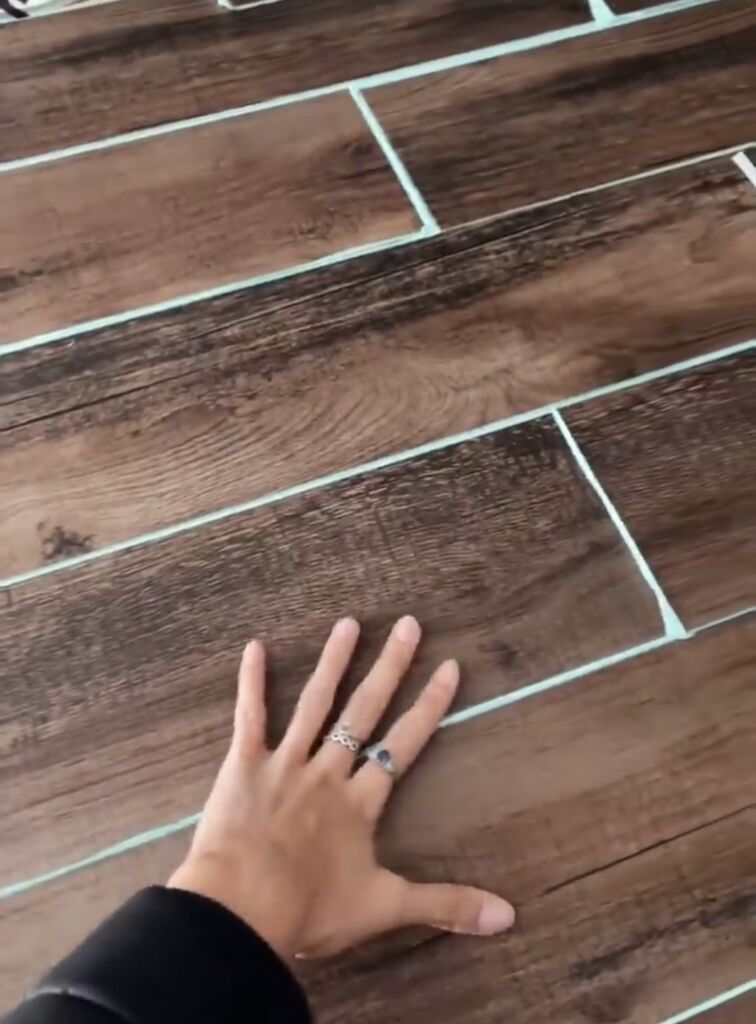
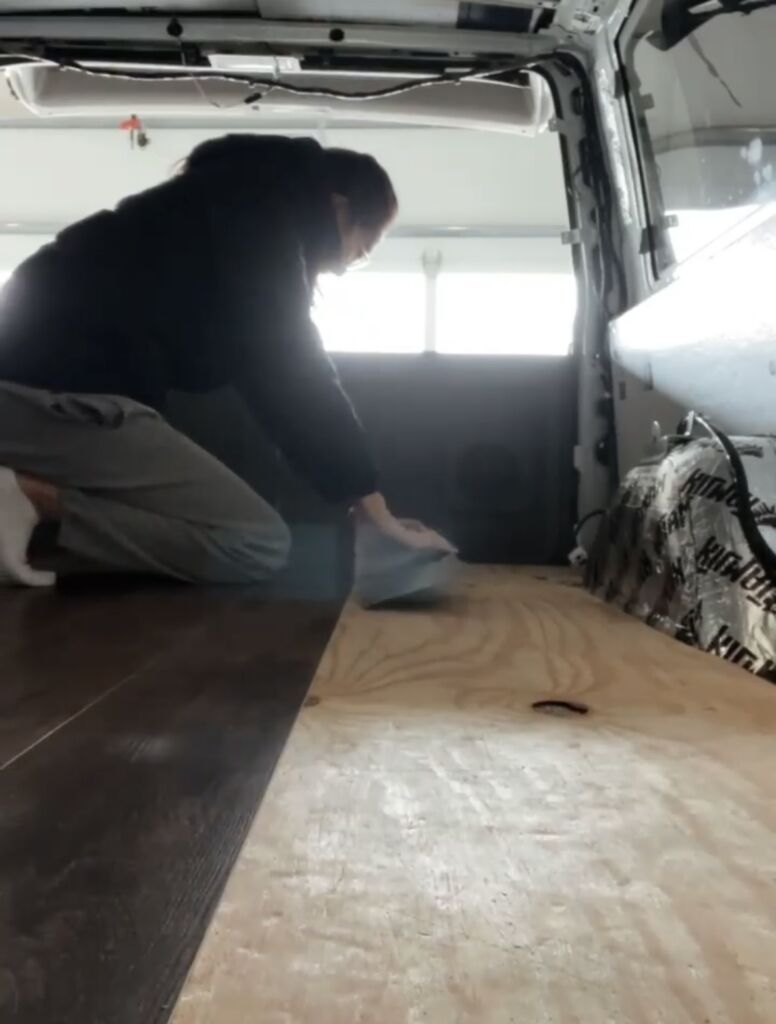
| FLOORING | Cost of Parts | # of Parts | Total Cost |
| Vinyl Plank Flooring | $1 | 40 | $40.00 |
Electrical and Solar
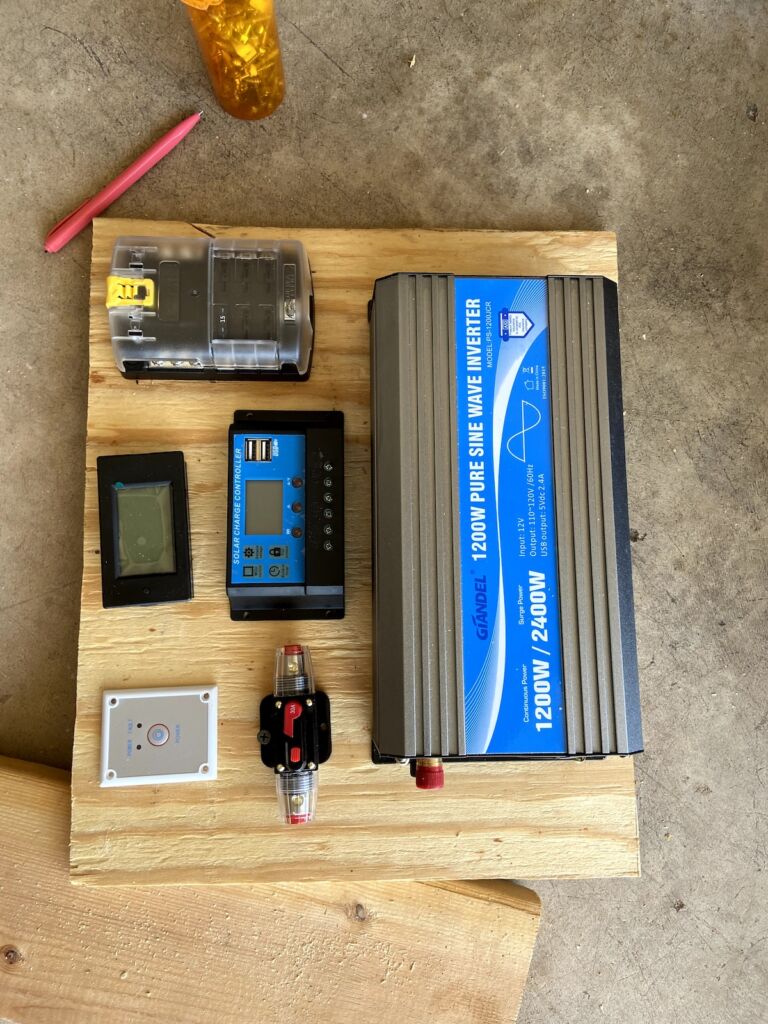
Setting up the electrical and solar system was by far the most difficult part of the project. I had a difficult time figuring out how to do it, which stalled the project by several months. I was also terrified of doing something wrong and blowing up the van (and myself) somehow.
Not only was this part the most stressful part of the van build, it was the most expensive as well. My electrical and solar system setup was $1,172.22.
After months of research, drafting a plan, stalling out of fear, and finally recruiting some help, I managed to get it all set up.
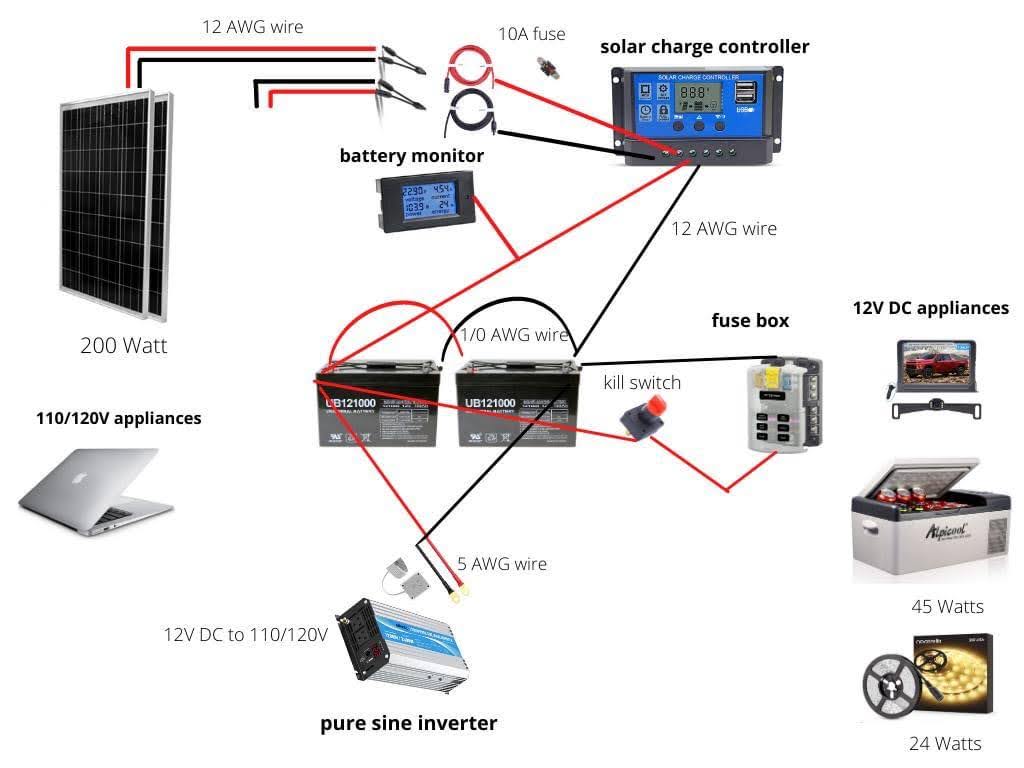
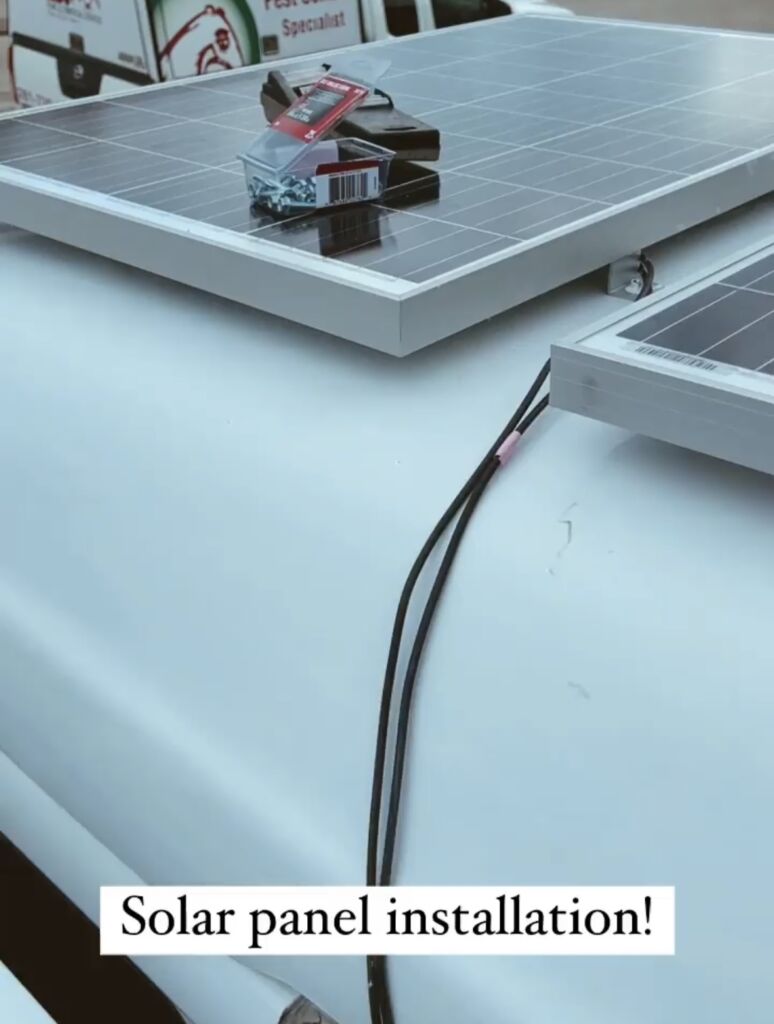
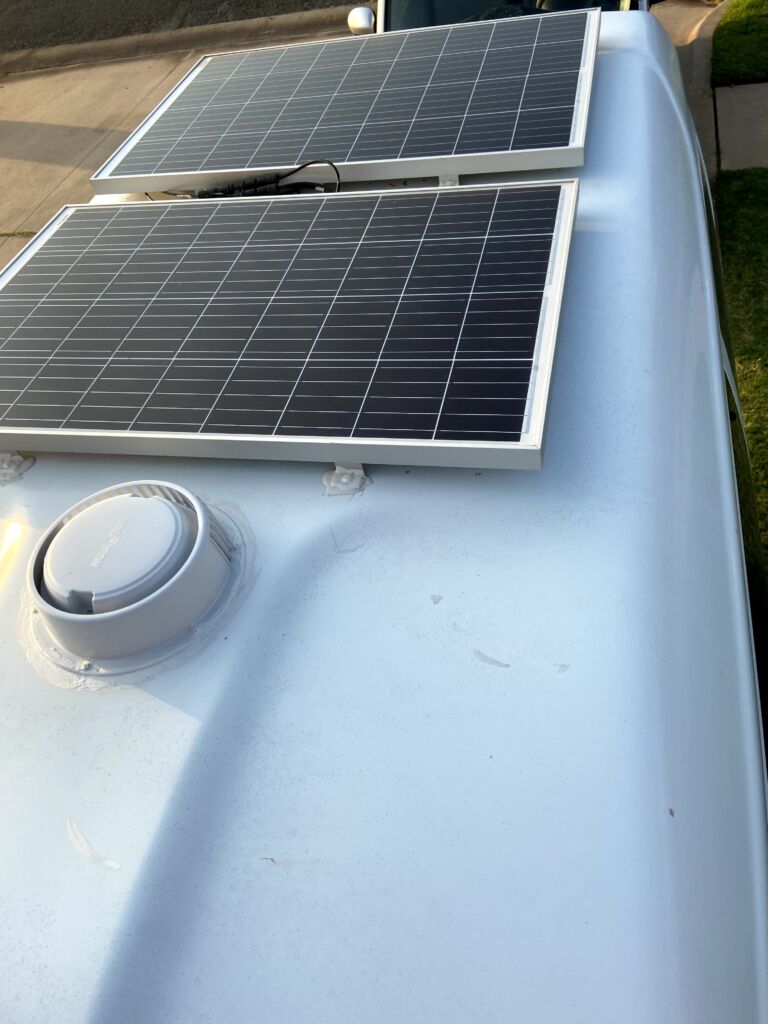
I spent an additional $18.14 for the hardware to secure the solar panels onto the roof.
| HARDWARE TO SECURE SOLAR PANELS | Cost of Parts | # of Parts | Total Cost |
| 1/4 in.-20 Stainless Steel Nylon Lock Nut (3-Pack) | $0.98 | 3 | $2.94 |
| 1/4 in.-20 x 2-1/2 in. Combo Round Head Stainless Steel Machine Screw (2-Pack) | $0.98 | 4 | $3.92 |
| 1/4″ x 1-1/4″ OD Stainless Fender Washer | $11.28 | 1 | $11.28 |
Wall and Ceiling Panels
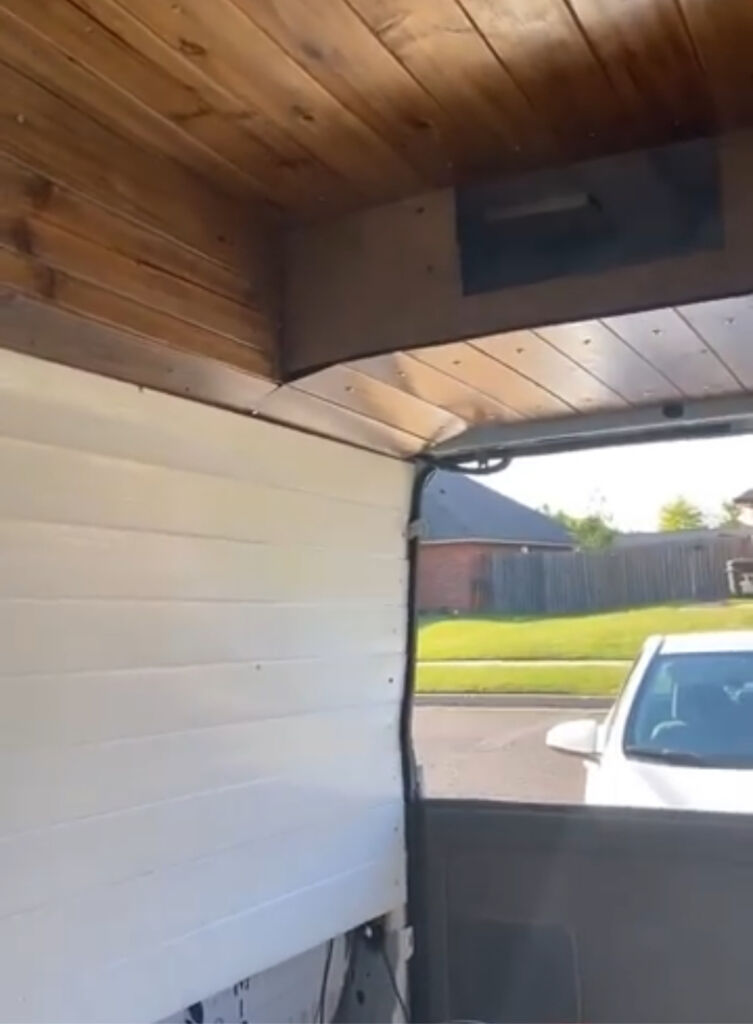
After successfully configuring the electrical system and not blowing up my van, I was finally ready to put up the wall and ceiling panels. I ended up paying a total of $146.62 for my wall and ceiling panels and trim.
| WALLS & CEILING PANELS | Cost of Parts | # of Parts | Total Cost |
| 5.5-in x 8-ft Unfinished Pine Tongue and Groove Wall Plank (Coverage Area: 3.6667-sq ft) | $18.97 | 6 | $113.82 |
| Utility Panel (Common: 1/8 in. x 4 ft. x 8 ft.; Actual: 0.106 in. x 48 in. x 96 in.) | $10.98 | 2 | $21.96 |
| DM L58 – 17/32 in. x 7/32 in. x 96 in. Solid Pine Wall and Cabinet Trim Moulding | $5.42 | 2 | $10.84 |
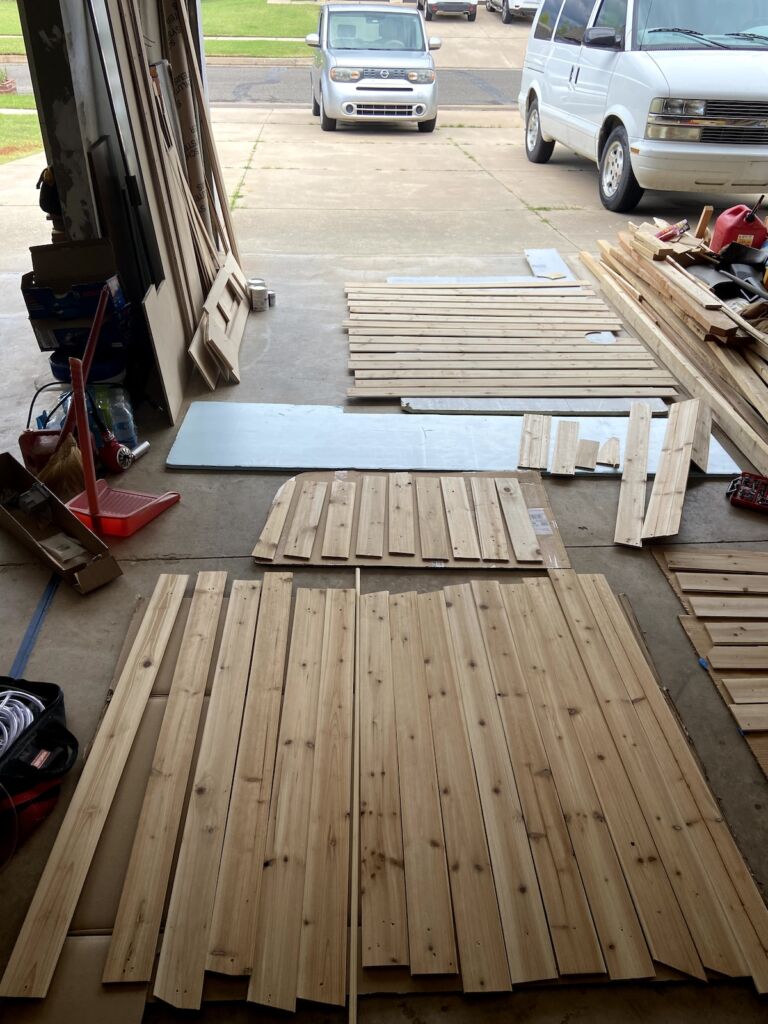
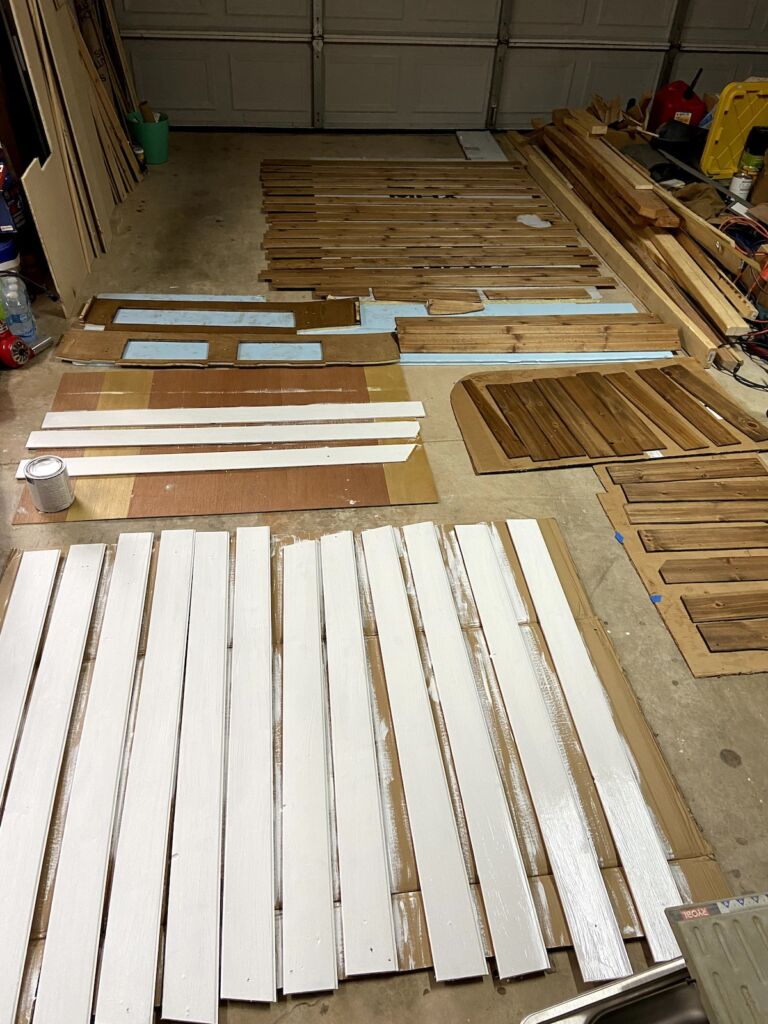
Since I wanted the white walls and wood ceiling aesthetic, I had to get painting supplies as well. This cost a total of $75.49.
| PAINTS/STAINS/WOOD FILLER/TOOLS | Cost of Parts | # of Parts | Total Cost |
| Painters Touch 2x Satin Moss Green | $4.28 | 1 | $4.28 |
| 1 qt. #TIS-516 Early American Transparent Oil-Based Advanced Formula Interior Wood Stain | $10.47 | 1 | $10.47 |
| 1 qt. Satin Clear Oil-Based Interior Fast Drying Polyurethane | $12.98 | 1 | $12.98 |
| Clear Gloss Oil-Based Polyurethane (Half Pint) | $6.98 | 1 | $6.98 |
| Gloss COLORmaxx White Enamel Interior/Exterior Paint (1-Quart) | $10.48 | 1 | $10.48 |
| Gloss White Enamel Interior Paint (Half Pint) | $5.48 | 1 | $5.48 |
| Plastic Wood 1.87-oz Natural Wood Filler | $5.48 | 1 | $5.48 |
| Trimaco 2-Pack 4-in x 5-in Cotton Floor Stain Pad | $2.88 | 1 | $2.88 |
| Foam 3.0 Wood Handle Brush | $0.97 | 2 | $1.94 |
| Better 1.0 Thin Angle Latex Brush | $5.97 | 1 | $5.97 |
| Econ 3.0 Flat Basic Brush | $4.57 | 1 | $4.57 |
| ProEssentials Paint Brushes, 3 ct | $3.00 | 1 | $3.00 |
| 1 Quart Paint Stick | $0.98 | 1 | $0.98 |
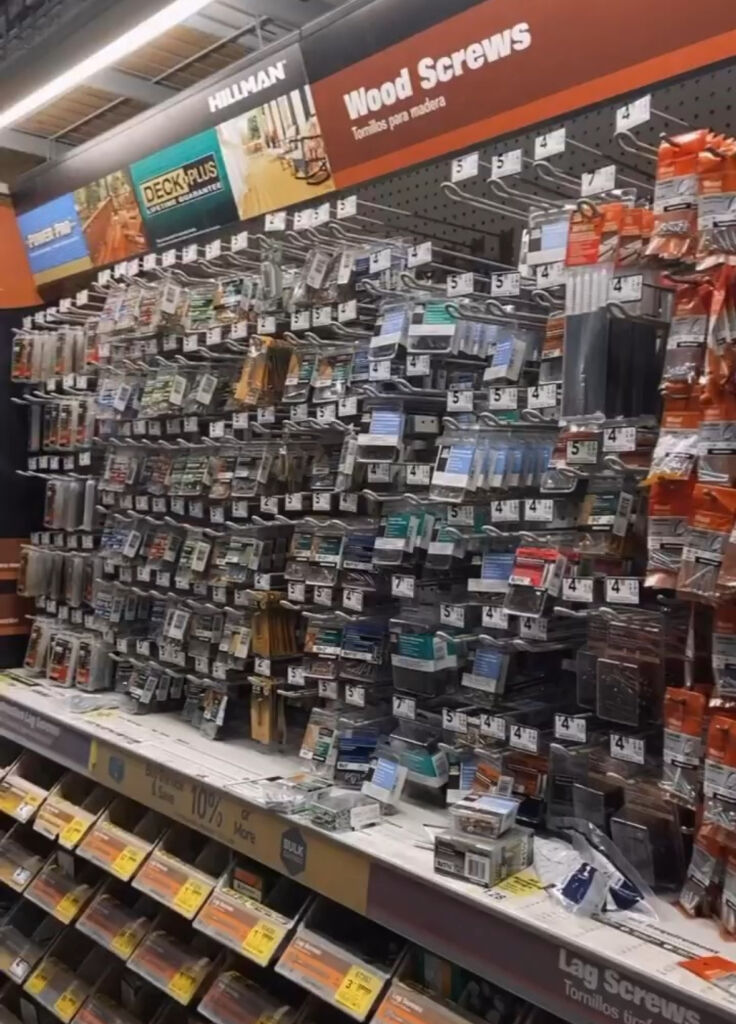
To attach the wall and ceiling panels and to build the furniture, I need to get a variety of screws, which ended up costing $34.83. I also got some free screws from my brother-in-law.
| SCREWS FOR ATTACHING WALL/CEILING PANELS & FURNITURE | Cost of Parts | # of Parts | Total Cost |
| 199-Piece Steel Zinc-Plated Screws Fastener Kit (Case Included) | $4.48 | 1 | $4.48 |
| #8 x 1-1/2-in Phillips-Drive Sheet Metal Screws (5-Count) | $3.84 | 3 | $11.52 |
| #6 x 3/4-in Silver Zinc-Plated Flat Interior Wood Screws(100-Count) | $5.48 | 1 | $5.48 |
| #8 x 1-1/4 in. Zinc Plated Steel Phillips Truss Head Drill Point Lath Screws (140-Pack) | $8.58 | 1 | $8.58 |
| Kreg 1″ Coarse Pocket Screw 100PK | $4.77 | 1 | $4.77 |
Interior Furniture Build
This was the second most difficult part of the project. As someone with Aphantasia (no ability to visualize anything mentally), I struggled with figuring out how all of the furniture pieces in the van would fit together. How do I build out the pull-out bed and cabinets in a way that makes the most sense?
I ended up having to recruit my brother-in-law for help again to help me put together a plan for the interior setup.
Building out the interior required more wood, which cost me a total of $212.45.

| WOOD | Cost of Parts | # of Parts | Total Cost |
| 1/2 in. x 4 ft. x 8 ft. PureBond Birch Plywood (for building storage) | $50.49 | 1 | $50.49 |
| Sande Plywood ( 1/2 in. Category x 4 ft. x 8 ft.) (for building storage) | $47.35 | 2 | $94.70 |
| 1 in. x 2 in. x 8 ft. Furring Strip Board (for framing) | $1.89 | 8 | $15.12 |
| 3/4 in. x 2 ft. x 4 ft. Pressure-Treated Plywood (for securing solar panels) | $20.78 | 1 | $20.78 |
| 1 in. x 4 in. x 8 ft. Furring Strip Board (for bed slats) | $4.48 | 7 | $31.36 |
| Free Wood for Bed Base | $0 | 1 | $0.00 |

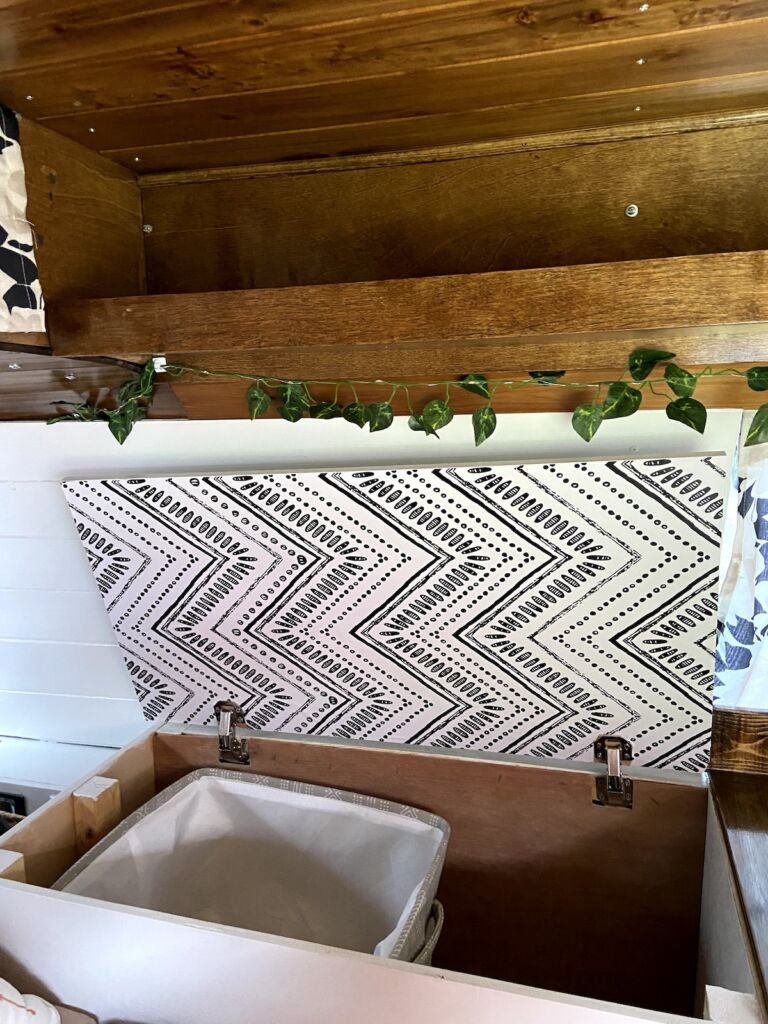
For my cabinets, I bought a variety of hardware to make it functional. The hardware cost a total of $52.58.
| CABINET HARDWARE | Cost of Parts | # of Parts | Total Cost |
| 2-Pack 20-in Drawer Slide | $17.98 | 1 | $17.98 |
| 20 PCS Folding Butt Hinges | $10.69 | 1 | $10.69 |
| 6 Pack Concealed Hinges with 48pcs Screws | $12.99 | 1 | $12.99 |
| 2-Pack Aged Brass Flush Cabinet Hinge | $2.98 | 1 | $2.98 |
| 1.548-in x 1.375-in x 2.048-in 18-Gauge Steel Angle | $0.68 | 3 | $2.04 |
| 3 in. (76 mm) Center-to-Center Antique Brass Decorative Drawer Pull | $1.98 | 1 | $1.98 |
| 1-1/8 in. (28mm) Antique Brass Scallop Edge Round Cabinet Knob | $0.98 | 2 | $1.96 |
| 4.4 lbs. Magnetic Catch, White (1-Pack) | $0.98 | 2 | $1.96 |
Bed
For my bed, I used a full-sized tri-fold foam folding mattress that I cut width-wise to fit. To cut the mattress to the right size, I used an electric carving knife that was meant to be used for cutting turkey meat. The total cost for my bed setup was $184.82.
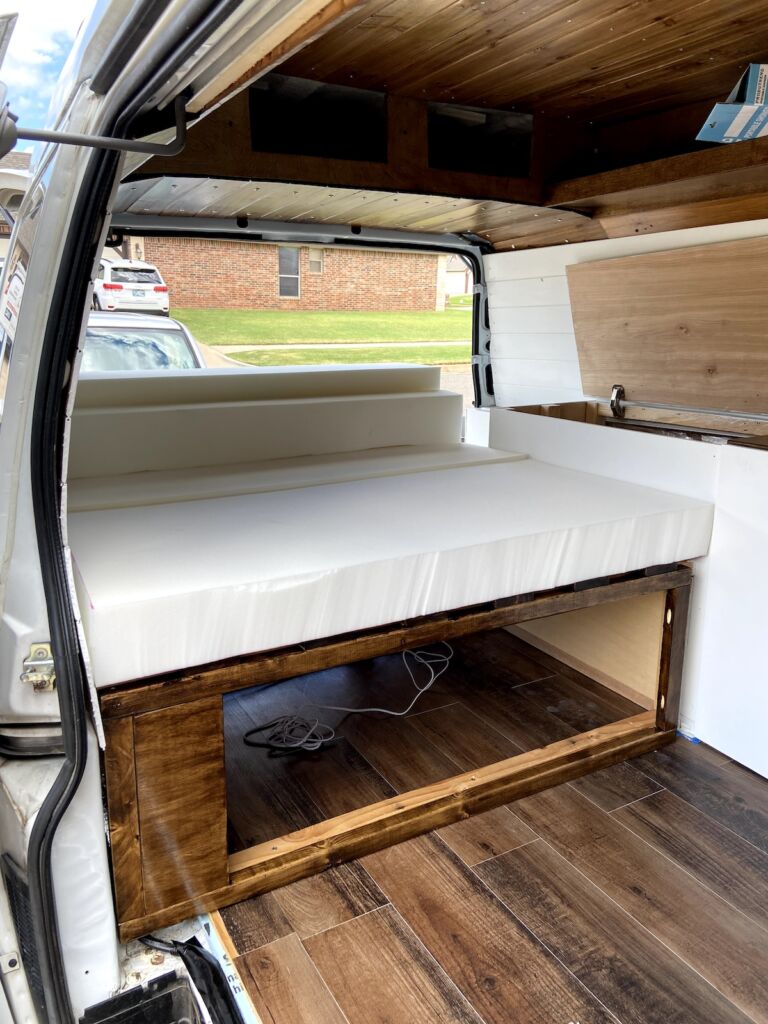
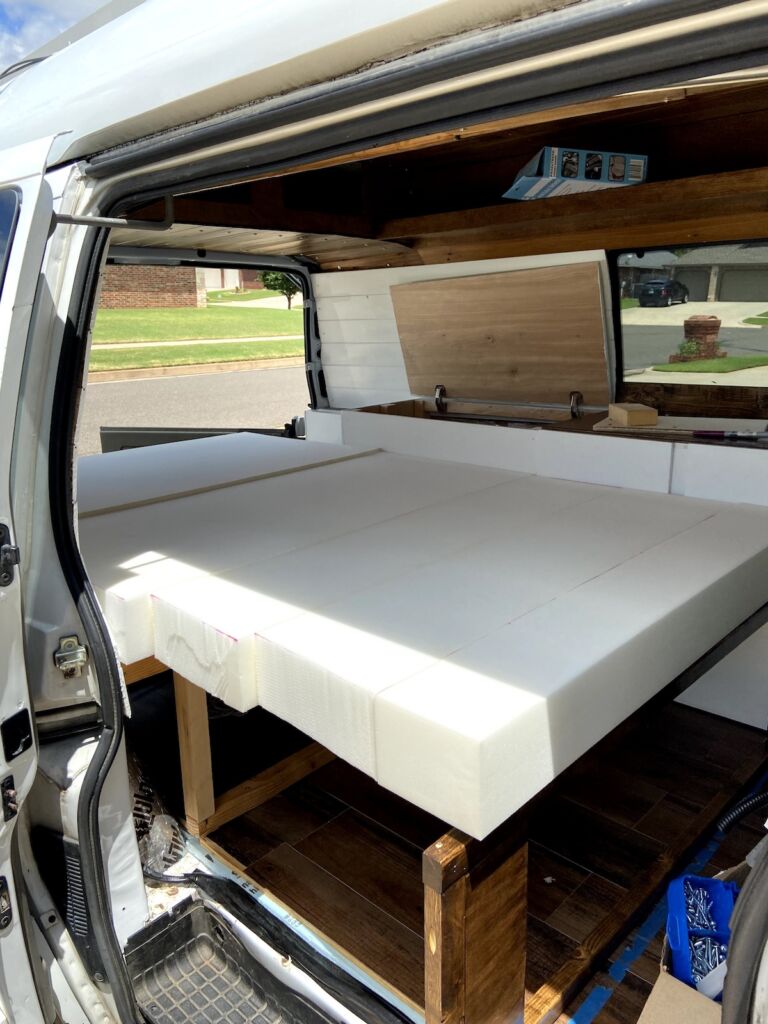
| BED | Cost of Parts | # of Parts | Total Cost |
| Milliard Tri-Fold Foam Folding Mattress and Sofa Bed for Guests (Full) | $144.99 | 1 | $144.99 |
| BLACK+DECKER 9-Inch Electric Carving Knife | $14.99 | 1 | $14.99 |
| Mainstays 300 Thread Count Easy Care Sheet Set, Full, Brownstone | $24.84 | 1 | $24.84 |
Kitchen
For my kitchen, I had a small sink and portable stove setup. The total cost for my kitchen setup was $280.51. However, the sink and the portable butane stove were gifted to me, so it was actually a bit less than that.
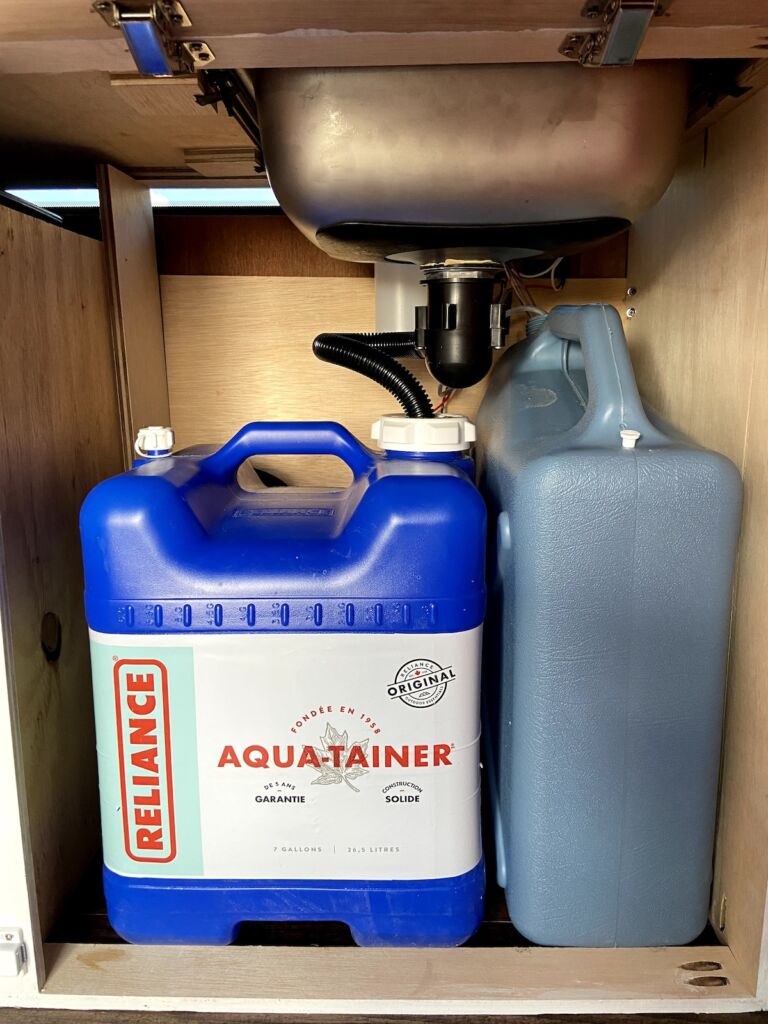

| KITCHEN | Cost of Parts | # of Parts | Total Cost |
| 12V Electric Water Faucet Tap with Switch | $59.99 | 1 | $59.99 |
| 12V Portable Submersible Water Pump | $49.99 | 1 | $49.99 |
| 3/8 in. I.D. x 1/2 in. O.D. x 10 ft. Clear Vinyl Tubing | $5.18 | 1 | $5.18 |
| Flexible Camper Drain Tap with Hose System | $13.98 | 1 | $13.98 |
| Topmount Stainless Steel 2-Holes Bar/Prep Sink | $42.95 | 1 | $42.95 *gifted |
| Soap Dispenser for Kitchen Sink | $9.99 | 1 | $9.99 |
| Coleman Portable Butane Stove with Carrying Case | $29.99 | 1 | $29.99 *gifted |
| Reliance Aqua-Tainer Water Container 7G | $14.97 | 1 | $14.97 |
| Ozark Trail Desert Patrol 6-Gal Water Jug | $13.47 | 1 | $13.47 |
| Zebra RV Table Leg, Folding ADJ 24″-29″ | $40.00 | 1 | $40.00 |
Curtains
Although not necessary, I wanted to have cute curtains in my van. I purchased some curtains from Walmart and altered them to fit. The curtains and curtain wire cost me $44.90.

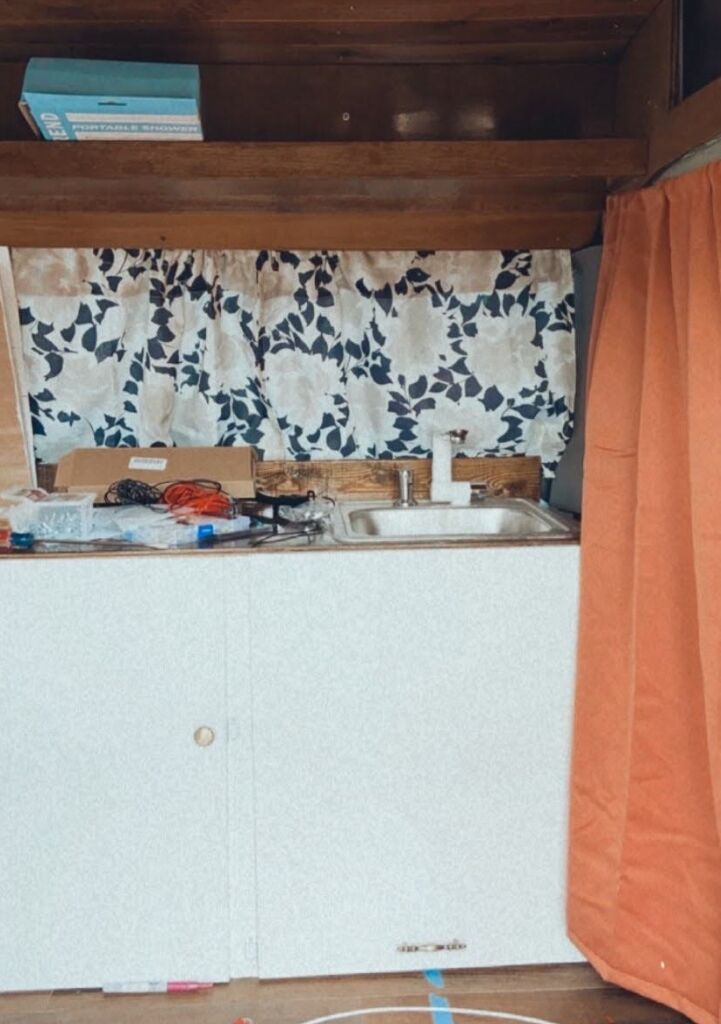
| CURTAINS | Cost of Parts | # of Parts | Total Cost |
| Gocelyn 2-Pack 3-Meter White Curtain Wires with 10 Stainless Steel Curtain Clips | $10.99 | 1 | $10.99 |
| Vangao Kitchen Tier Curtains 24 inch Rod Pocket Half Window Curtain | $15.99 | 1 | $15.99 |
| Mainstays Solid Color Room Darkening Rod Pocket Curtain Panel Pair, Set of 2, Terracotta, 30 x 84 | $9.94 | 1 | $9.94 |
| Mainstays Floral 3 Piece Window Curtain Set, 56″ x 36″, Black | $7.98 | 1 | $7.98 |
Appliances
I purchased a variety of small appliances to enhance my van life experience, such as a portable outdoor shower, portable fridge, and roof vent. These appliances totaled up to $473.08.
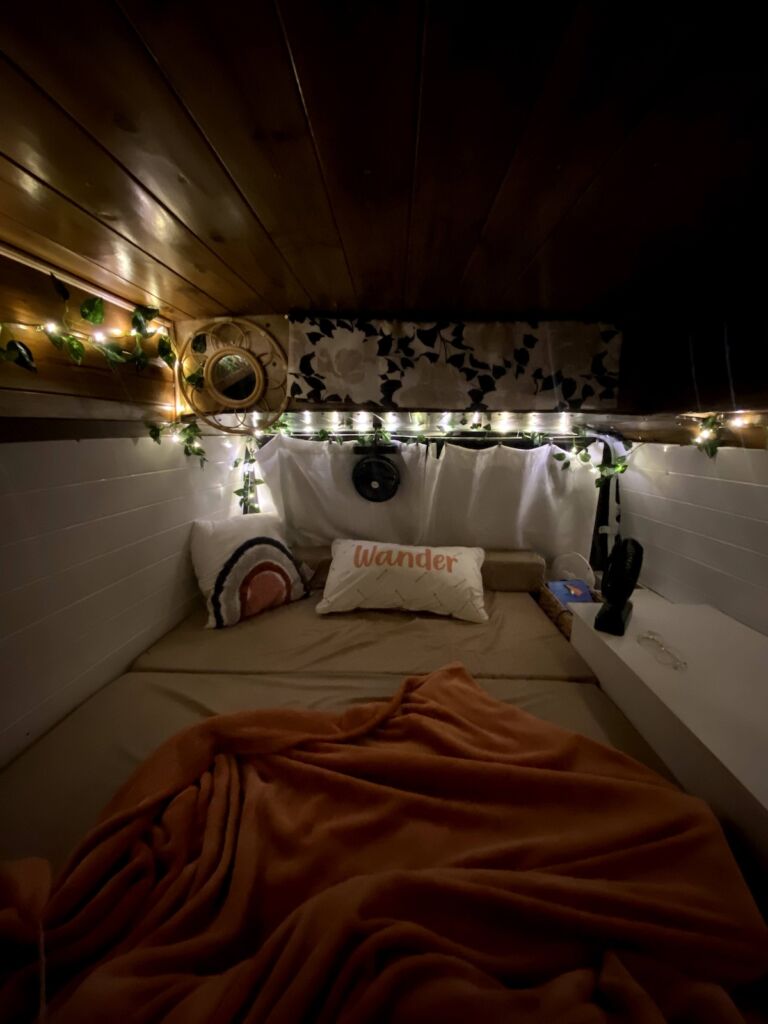
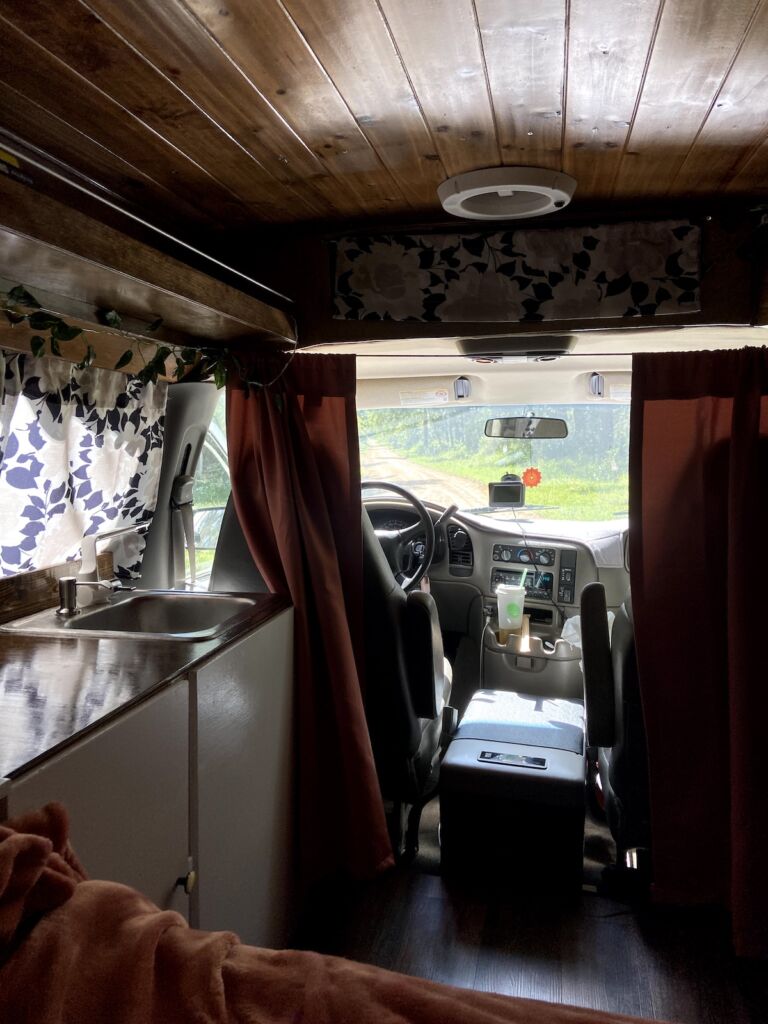
| APPLIANCES | Cost of Parts | # of Parts | Total Cost |
| LeeKooLuu LK3 HD 1080P Backup Camera with Monitor Kit | $39.99 | 1 | $39.99 |
| 10000mAh Battery Operated Camping Fan with LED Light | $33.99 | 2 | $67.98 |
| Portable Outdoor Shower, Battery Powered | $34.99 | 1 | $34.99 *gifted |
| Reliance Products Hassock Portable Lightweight Self-Contained Toilet | $42.23 | 1 | $42.23 |
| AstroAI Portable Freezer 12 Volt Car Refrigerator 16 Quart Fridge | $199.99 | 1 | $199.99 |
| MaxxFan Dome Plus Roof Vent w/ 12V Fan – LED Light – 6″ Diameter – Manual Lift – White | $87.90 | 1 | $87.90 |
Security
I did not have money to set up an advanced security system for my van. However, I wanted to have some security features as I would be solo traveling in it. I settled on some motion sensor lights to keep people away at night and a steering wheel lock to prevent it from being stolen. To be honest, I didn’t use either very much. I spent a total of $42.10 on these items.
(I also always kept pepper spray and a tazer inside…)
| SECURITY | Cost of Parts | # of Parts | Total Cost |
| MONOJOY Car Steering Wheel Lock Universal Fit Vehicles with 3 Keys | $29.11 | 1 | $29.11 |
| Motion Sensor Light, Searik Battery Powered | $12.99 | 1 | $12.99 |
Tools
To build the campervan required a lot of different tools. Fortunately, my brother-in-law had pretty much every tool that I needed. The only tool I had to buy was the foam gun I used for insulation, which I spent $16.99 on. If you don’t have tools or anyone you can borrow tools from, you can rent them from Home Depot.
| TOOLS | Cost of Parts | # of Parts | Total Cost |
| Foam Gun | $16.99 | 1 | $16.99 |
| Miter Saw | $0 | 1 | $0.00 |
| Jig Saw | $0 | 1 | $0.00 |
| Circular Saw | $0 | 1 | $0.00 |
| Table Saw | $0 | 1 | $0.00 |
| Cordless Drill / Driver | $0 | 1 | $0.00 |
| Mouse Detail Sander | $0 | 1 | $0.00 |
| Mouse Detail Sander Sandpaper Sanding Paper | $0 | 1 | $0.00 |
| Kreg Pocket Hole Jig System | $0 | 1 | $0.00 |
| Heat Gun | $0 | 1 | $0.00 |
| Wire Crimper/Cutter/Stripper | $0 | 1 | $0.00 |
Final Costs
After finishing the campervan build, I gathered all of the receipts and tallied up the costs. The build cost plus the initial repairs, plus the cost of the van came out to be $6,945.21.
I wish I could say that that was all the money I spent on it. But unfortunately, the van broke down a few times on the road, and I had some hefty mechanic bills. I spent another $5,262.90 on repairs for it.
| Fixing the Van | Cost of Parts | # of Parts | Total Cost |
| Engine Mount (2) + Serpentine Belt | $0.00 | 3 | $500.00 |
| Brake Pad + Brake Hose + Caliper (2) + Labor | $0.00 | 4 | $670.55 |
| Fuel Pump + Ignition Coil + Labor | $0.00 | 2 | $592.35 |
| Transmission (Rebuild) – April 2022 | $3,500.00 | 1 | $3,500.00 |
This brought me to a total of $12,208.11 for van-related expenses. After two years of owning the van, I finally decided to sell it. I was able to recoup all of my expenses and even make a few thousand dollars profit from it.
For a list of my van build supplies that I purchased from Amazon, check out my Van Build Supplies list.
If you’re thinking about building out a campervan, just do it! You don’t need a fully decked out $80,000 campervan to make your van life dreams come true.
Interested in seeing more photos and videos of my campervan build? Check out my van-build stories on my Instagram account!


